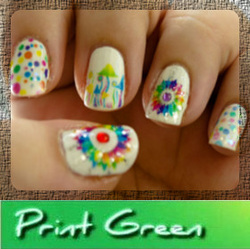
To those who are fond of creating nail arts and embellishing their nails with fancy designs, you'll surely like our today's post. It's not actually a craft or recycling project, it's just a plain art project for nail art lovers out there. Of course with a touch of technology, we'll make the hard way turn into a very simple process with the use of a laser printer.
Who would have thought that laser printers can also play an important role in lavishing your nails with coloured prints. Before we go through the instructions, first you have to prepare some the required materials below :
To start, get all those designs printed using your laser printer, this art project works best with digital scrap book papers. Make sure those designs will fit onto your nails, if not just cut them accordingly to the size of your nails. For better results, print a test page with the design you want and see if it fits.
Once you're done printing the designs, we now go to the step of coloring your nails. Use any color of nail polish depending on your preference, take note that it will serve as the base or background of the designs, so might as well check if the color are not contradicting each other. Cover your nails with enough polish and let it dry completely for a few minutes.
While waiting for your nails to dry out, get the printed materials ready by arranging the cut outs, if they're not yet cut, asked someone for help as you might ruin the nail polish that you're waiting to dry.
Double check your nails if the polish is completely dried, if so proceed on this step, using a small paintbrush dampen the opposite side of the printout with nail polish remover. Then choose which nail you'll use it and press it firmly with the printed area facing your nail, avoid moving it once placed. Wet it once more with the polish remover while pressing down firmly, don't put much pressure.
If you think the print has been transferred properly in your nail, lift the cut out from its edge and peel off the paper. Supposedly the toner print must stick with the base nail polish, if it does then you made it right. Just do the same process to the other nails until you're done with all of it. Again let it dry in a few more minutes to let the toners stick firmly onto the nail polish.
Remove any paper residue before applying the clear nail polish as a coating. Be very careful with this last step, you may smear the design with improper application. To avoid it, apply the clear nail polish by running it once each nail just make you covered the whole of it.
Isn't it too easy? Just follow the instructions carefully and you're good to go. Also, make sure you're laser printer has enough of consumables for this project, unless you want to run downtown for a replacement while waiting for your nails to dry out. Kidding aside, you can also use compatibles or recycled toner cartridges, output has no difference at all.
Who would have thought that laser printers can also play an important role in lavishing your nails with coloured prints. Before we go through the instructions, first you have to prepare some the required materials below :
- laser printer
- paper materials (compatible for laser printing)
- nail polish and nail polish remover
- clear nail polish (for top coating)
To start, get all those designs printed using your laser printer, this art project works best with digital scrap book papers. Make sure those designs will fit onto your nails, if not just cut them accordingly to the size of your nails. For better results, print a test page with the design you want and see if it fits.
Once you're done printing the designs, we now go to the step of coloring your nails. Use any color of nail polish depending on your preference, take note that it will serve as the base or background of the designs, so might as well check if the color are not contradicting each other. Cover your nails with enough polish and let it dry completely for a few minutes.
While waiting for your nails to dry out, get the printed materials ready by arranging the cut outs, if they're not yet cut, asked someone for help as you might ruin the nail polish that you're waiting to dry.
Double check your nails if the polish is completely dried, if so proceed on this step, using a small paintbrush dampen the opposite side of the printout with nail polish remover. Then choose which nail you'll use it and press it firmly with the printed area facing your nail, avoid moving it once placed. Wet it once more with the polish remover while pressing down firmly, don't put much pressure.
If you think the print has been transferred properly in your nail, lift the cut out from its edge and peel off the paper. Supposedly the toner print must stick with the base nail polish, if it does then you made it right. Just do the same process to the other nails until you're done with all of it. Again let it dry in a few more minutes to let the toners stick firmly onto the nail polish.
Remove any paper residue before applying the clear nail polish as a coating. Be very careful with this last step, you may smear the design with improper application. To avoid it, apply the clear nail polish by running it once each nail just make you covered the whole of it.
Isn't it too easy? Just follow the instructions carefully and you're good to go. Also, make sure you're laser printer has enough of consumables for this project, unless you want to run downtown for a replacement while waiting for your nails to dry out. Kidding aside, you can also use compatibles or recycled toner cartridges, output has no difference at all.
 RSS Feed