 The “ No Toner” error message that you frequently experience with your Brother MFC-8510DN printer indicates that either the drum unit or the cartridge, or it could be both of these components are not installed correctly. It’s pretty easy to solve since it’s not of a critical error unlike most that need thorough troubleshooting processes to be resolved. What you just need is simply the knowledge on how to remove the unit’s consumable items inside particularly the drum and toner. So basically, it’s similar and very simple as if you are just about to replace an empty cartridge and drum with new ones. The process will only take about 10-15minutes depending on how fast you can execute the steps we provide below. Note: This guide will also work with laser printer models inline with the MFC-8510 series and some MFC-series units. Before you begin with the process, restart your unit first and see if the problem disappears. If it still appears then proceed on the instructions below. While the unit is still ON, let it rest for like 10 minutes or so, letting it cool down a bit before you make any actions inside it. If you don’t want to get your hands dirty with toner particles you may wear protective gloves with antistatic or just a normal pair of gloves. Open the front cover through pressing the release button found at the top-center of the printer. Pull it outward to access the Brother TN750 toner and drum. With proper handling, take the whole part from which the cartridge and drum seat. Cover a flat surface with newspaper sheets or anything that can work as a cover for the area where you will put the cartridge assembly down. Separate the toner from the drum by unlocking the green lock tab at either side of the item. Simply push it down to release the cartridge so you can lift it up. Remember not to touch the shaded part (roller) to prevent any print problems. Check if the cartridge has any defect or dent that might cause the error. If everything is fine, reseat it back into its drum slot by pushing it in place until the green lever lock makes a click sound. Double-check the drum and toner by shaking gently to see if they’re properly and securely locked into place. Install the cartridge assembly back inside the printer, close the front cover and restart your unit. With a bit of luck, it should work like good as new.
 While roaming in the internet looking for a printer problem that can be featured on today’s post, I run across a thread from HP support forums and a topic just came up to me. It’s a print cartridge problem specifically with an HP 4500 series model unit. The issue basically is mainly with the unit’s consumables particularly the toner cartridges. According to some aggravated customers, their printers just stop printing colored documents due to an error that says: Print Cartridge Problem Tri-Color, followed by some instructions telling the user to refer on the device’s document to troubleshoot the error. However, you may read every guide from the manual that is related to the issue to no avail. The problem or rather the thread for this issue is still active, and customers are waiting for a real good response that might fix it. However, it seems that users help out their fellow users simply because their beloved manufacturer can’t even give a working solution for it. Back to the problem, as the title of our posts explains, there are solutions from the same thread which came from concerned users that would like to help out. The funny thing is that their suggested workarounds are kind of weird, something like it. Check the ones below for you to know. One of them suggested spitting on the HP 4500 cartridge contacts, like very lightly to prevent damaging the item. If you want you can probably dip your fingers to your tongue and rub it gently on the contacts. Sounds gross or whatever, but it did work for some. Another weird suggestion is blowing the cartridge, not like a balloon. Just give it a nice blow, perhaps the contacts are not fully detected by the machine due to dust or toner build up. But I’m thinking, maybe it is because they removed then re-install the replacement cartridge from the printer which helps a lot. You see, taking the toner cartridges out of the unit then reseating them back is an old-age method that really does the trick on most issues related to print supplies. Others have resorted to buying a new replacement which roughly costs around $29 more or less. To find out that they wasted their money from purchasing the previous cartridge that caused the problem. It is a costly method indeed, especially if you’re not sure if buying a new one would really resolved the problem. But what can we users do if the manufacturer itself can’t even give us the right solution, guess we have no choice but to try everything that might work.
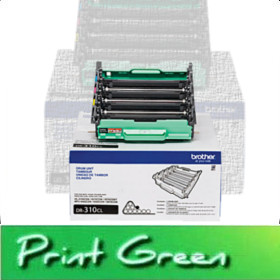
 Brother DR310CL Drum Unit Brother DR310CL Drum Unit Whenever our printers run out of cartridges we only have to replace whichever is empty with a new one, and everything’s solved. While with imaging drum, the component or rather the consumable where you install the cartridges, is a bit more arduous. Because even after you replace the drum with a new one it doesn’t end there. You still have to reset the drum counter to complete the process. Installing the imaging drum on a laser printer is not that too difficult to consider, in fact it’s simply easy. Once you get used to it, doing it frequently wouldn’t give you any trouble. The task that follows after drum installation can be called counter resetting. This part requires the user to literally reset the recorded count back to zero so the printer could recognize the drums as new replacements. How is drum counter resetting perform? First of all, it depends on the control panel of the machine model you use. The one we use with the test has mono backlit screen and uses Brother DR310CL drum unit.Since there are printers with touch-screen LCD while others don’t support such, the process is split into two. For Brother multifunction printers with plain mono display, refer on the steps below: - Locate and press the Menu button from the panel.
- From the list of options select “Machine Info” using the arrow keys and OK button.
- Next, select “Reset Menu” followed by selecting “Drum”.
- When prompted, hit the number 1 key from the numeric pad and let the machine execute the command.
- If it’s done, press the red “Stop” button to exit.
While to those who are using printers with touch-screen LCD, these are the steps you should follow: - Perform the first two steps provided above on a similar manner, but this time the button for “Menu” and “Machine Info” can be found on the screen.
- It’s somehow the same with the steps for printers with mono display. The only difference is that the keys to press are found on the LCD. Still you need to choose “Reset Menu” and then followed by “Drum”.
- The machine will prompt a message similar to “Reset the Drum”, of course you need to select Yes to execute the command.
- To stop the process, there’s a stop button on the screen, or exit once done.
If you find it useful, please let us know with your comments below. We hope it did help you on how to reset the Drum Counter of your Brother DR310CL drum unit.
One of the networked-ready models that Brother has to offer is the HL-3170CDW, which is obviously part of the HL-series. It’s a digital color LED printer, hence it requires four consumable items mainly the Brother TN221 toner cartridges. This machine, if you may ask, is not just impressive when it comes to satisfying color printing demands, it’s also capable of providing wireless functionalities such as mobile printing. Through user’s high-end gadgets like tablets, laptops and smartphones, they can make use of the printer’s WiFi-support and connect directly to the printer to send print tasks. But, what if you have the printer and the mobile device, yet you can’t enjoy mobile printing due to some problems with either the machine or your devices? How should you handle such problem when you have no clue, or not even a single idea what to do? The solution is now here, if you’re experiencing “ No AirPrint Printer” error message with your Brother HL-3170CDW printer and Apple smartphone, then here’s a quick and easy solution to tap your printer and let it wake up from its sleep. - Start by checking your own iOS-supported mobile devices and see if the AirPlane Mode is enabled. To explain, when the said mode is actually enable, your phone or tablet will prevent emitting wireless signals. Thus, in turn the printer will not be able to recognize the device. - Turn the Airplane mode OFF, then turn the WiFi settings ON. You can’t use Apple AirPrint technology if neither of the units you’re using is connected to the same wireless network. - Check if the problem is fixed. If not, let’s work with your printer by proceeding to the next solutions. - Restart the unit so you can see if it will connect to the network where your mobile device is currently connected. If you installed and setup the printer to a computer via USB cable, you have to configure the unit to connect to a wireless network. If you prefer wired connection, you have to join the printer to the same network by directly connecting its cable to the router. To get a picture of how the proper connection should be, refer below: Let’s set A as the Internet/Service provider, B as the Router, and C as the wireless access point. Point C should be connected to B which is connected to A. Ideally, the printer should also be connected to C, such that the wireless function of C is ON. While if you connect the printer to B, you need to turn OFF the wireless function of C. I hope this solution could help you fix the problem with your Brother HL-3170CDW and Apple iOS mobile devices.
Do you know that an empty Brother toner cartridge though they say “empty” still has 605 grams of toners inside? It is a fact, and it’s the same information you will get even if you call their customer support. It’s neither on the user manual nor any printed document that you get upon purchasing the unit. So whenever a user faces the “Replace Toner” message and end up removing supplies from the unit then replacing with a new set, they’re like throwing a percent of their spent money. Some users have resorted to using a black tape to cover the sensor chip embedded from the cartridge, hoping that it would bypass the machine and will eventually remove the error. To no avail, the message from its control panel’s status display still persists. While others were successful and fortunate to make the trick work, there’s no guarantee that it will do the same wonder to those having the exact problem. We experienced the same issue as well, have tried a lot of tricks and done a lot of tinkering, unfortunately none of those worked. Until we found this what they technically called Toner Reset process which was originally posted in FixYourOwnPrinter. We are genuinely grateful to the one who started the thread that now we have a working solution. Note: The procedure below was tested on a Brother MFC-9460 CDN printer, and Brother TN210 toner cartridges. It may also work with a few Brother MFC and DCP models, but we can’t give you the exact list of supported printers. Just follow the steps below and make sure you execute it properly to make it work. Step 1. If the unit is already turned ON, just start by opening the front door (the one that you usually open when accessing the toners). Look at the screen/LCD from the control panel, there should be an indication more likely or exactly to “Cover is Open” message. Step 2. By pressing the Clear button on the screen, navigate through the options until you reach the Reset Menu page. Step 3. In that page, you should see a list of supported toner cartridges that you can used with your printer. Choose the right model that you want to reset. If it’s the black, then choose B.TNR-S if you’re using a small-capacity toner, or B.TNR-H for high-capacity. Step 4. Repeat step 3, until you have reset all the four toner cartridges installed. To reset the chosen cartridge, hit or press “1”. Step 5. For the last step, I know you’re excited to see if it works so here’s the last thing to do. Press the Clear or Back button to step back from the Reset Menu and you can now close the front door. Restart the printer, cross your fingers and hope that it worked.
Three dimensional printing or 3D printing has one major criticism, well maybe this one's the sentiment of a few green geeks, I don't know if you're more likely concern as well. We are very much aware that 3D printers use plastic filaments to create objects, for a while we were fascinated of what it can do and how promising this technology can be. But knowing the hazards and negative effects it might bring to the environment, would it still be worth it to commercialized such machine? Good thing before anyone else had to pull the string, researchers and developers had thought of discovering alternative materials to use for 3D printing. Wood-based filament were introduced last year in the field of 3D printing technology. Through such material, creators were able to print wooden-like objects and stuffs that mimics the characteristics of a real wood. Honestly it's actually wood so what do you expect, right? LAYWOO-D3 was one of the revolutionized 3D printer that uses wood as an alternative printing material. Objects printed using wood filament do smell, look and exhibits texture and sturdiness like a real wood. Metals were also used as filaments, but it's not too efficient since we all know that minerals used to create metals are mostly non-renewable. Although it's a bit fancy to have your accessories printed using a 3D printer, especially if you have the talent to design it your own. Silicone materials are still trending and one of the latest application of silicone 3D printing is a prosthetic foot made specially for a fluffy duck. Buttercup as they called it was born with a backwards foot, and with the power of 3D printing, this small little being was given a chance to walk normally like any other ducks around. Furthermore, artificial bones can now be created through such technology. Constructed for medical use, these artificial bones will soon inspire people with disabilities and might lead to a new discovery where researches might be able to reproduce real bones using human cells. Sounds too good to be true? Well, recently 3D printing technology has been utilized to create human-tissue like material, a breakthrough that is mainly for medical purposes for now. From earth-damaging materials to eco-friendly filaments, aside from the aforementioned alternative filaments for 3D printers, salt, concrete and paper were also used in 3D printing. Perhaps the days of plastic filaments are slowly coming to an end. Researchers are continuously developing substitute materials which may work with 3D printing, although you'll find that most of the news recently regarding three-dimensional printing is somewhat related to medical practices. Bottom-line is, through these alternative materials they're eradicating the need for plastic substrates as filament for 3D printers. Hoping that it will ultimately lead to a new era where 3D printers are solely producing environment friendly output. Just like conventional printers such as lasers and inkjets, before we've been accustomed to cartridges that are damaging the environment, but now we can find alternative like eco-friendly toner cartridges and ink cartridges which promotes recycling and sustainability.
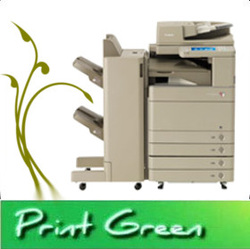 Canon does have a number of recycling programs to help preserve our environment. While these programs are still aiding in sustainability, they coexist with what we called as sustainable printers. Along with Canon's dedication to support environmental protection and the likes, the company recently released one of their latest printer that supports green printing with the ImageRunner Advance C5240i. What makes it different among the other conventional printers is that, the C5240i was built through organic plastic materials from renewable biomass components.Bio-plastic materials as we all know has a property that can't stand high heat levels especially the generated heat from a printing machine. Due to this innovation, Canon's imageRunner Advance C5240i printer was acknowledge and obtain awards from Energy Star, TEC2 and EPEAT. It was absolutely worthy to achieve the Gold rating from EPEAT, the highest rating that could be achieved. In addition, through the printer's 1 Watt energy consumption when in Sleep Mode, it's certainly enough to be called a green printer. With all those environment friendly features that you won't always find in any printer, its performance is surprisingly far better than you might have thought. Its print speed is quite impressive, rated at 40 pages per minute in mono printing, and 35ppm in color mode. It also offer a nice and adjustable color touchscreen LCD which is generally useful when the machine is set as a standalone copier.It may seem unusual to hear some news about a printer made from bio-plastic materials, but you know, technology has a lot more to improve and will eventually offer us the things we thought would be impossible for such purpose, then prove us wrong. Imagine this green printer and you're using recycled toner cartridges, a machine made from renewable substances that uses consumables from reused materials, our world would be grateful to have them both. Printers and all technologically produce materials, they all contribute in Global warming, actually even those that are not made through the wonders of technology. There are several factors that may contribute in Global warming, hence if there's anything that might help on reducing such negative impacts, we must take advantage of it no matter what.
 Are you familiar to some international standards and certifications a company or organization may received or have, to be claimed as environment friendly? These green credentials defines the effectiveness of their products as being environmentally oriented. If your printer or supplies either has one of the following or probably have a few of these, then you're more than lucky to print the eco-friendly way. A certificate that's based with the international standard, the ISO 14001 or ISO 14001 EMS (Environmental Management Standards) aids on reducing negative ecological impacts of various organizations and operations. There are laws and regulations related to environment preservation from which they must comply to improve and obtain the ISO 14001 Certificate. Being the most valued green certificate, money is not the only factor involved to achieve such credential, time and dedication must be invested as well. Another worthy and honored certification is the FSC ( Forest Stewardship Council ) is an independent organization that provides internationally recognized certification to companies that promote the same mission to responsibly protect the world's forestry. Printer manufacturers are not the only ones that can be certified by FSC, even paper manufacturers may obtain it. A certification system similar to FSC is the PEFC (Programme for the Endorsement of Forest Certification), the world's largest forest certification system. One of the forest certification standard that grants an eco-label to PEFC certified companies and organizations, which can be easily identified by most consumers. Do you know that Hewlett-Packard printing solutions and paper products are both FSC and PEFC certified? Aside from the Energy Star marks that you can find in every machines, HP oaths to reduce the impacts of their company on the environment particularly in the printing industry. Some recycled paper products may have less quality that is suitable for printing, however a paper product that has been FSC, SFI and PEFC certified ensures the best output while producing less environmental impacts to the environment. Companies and manufacturers that have satisfied the standards and requirements of these certifications and laws, have demonstrated a commendable and laudable effort on helping in the sustainability of our forestry around the world. Perhaps by now, you can at least conclude if your printing practices, as well as the machine and supplies you're using is truly environment friendly or not. Paper materials used for printing are available in recycled types, even the consumables that printer uses are recycled. Printer manufacturers are producing eco-friendly toner cartridges and ink cartridges to prolong sustainability, these products are also bounded by laws and quality test to reassure their customers about the quality and performance of their products.
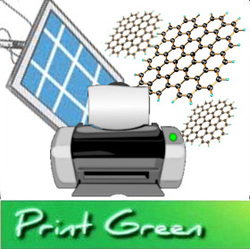 Inkjet printers are not just for conventional printing, and this has been proven years ago. From its basic function to print text, images and graphics either mono or color, it's main purpose evolve into something more unusual. Let's admit it, researchers and developers are really good at this, surprising us with their inventions and breakthrough that brought us to this new world. In the year of 2008, Konarka Technologies, developed a printable solar panel film which can be used for photovoltaic solar panels. With the use of an inkjet printer they were able to produce solar panels as thin as a plain paper sheet through common inkjet printing process. Konarka developers replaced the ink that we commonly used in our everyday printing needs, with solar cell materials, while the sheet from where these matters will be printed are not just a typical paper sheet but a special and flexible plastic substrate. It became a hit since printed solar cells are way cheaper than silicon panels, however the option to release it for the masses is not considered yet. Konarka's breakthrough was followed by another discovery from MIT Discoveries. Production and installation of solar panels are normally expensive, thus, once an alternative came into the consumer's view it will surely make a hype. That's what the MIT Researcher's figured out, a way from which solar cells can be printed onto paper materials using the printing process similar to an inkjet printer. The invention was called semiconductor-coated paper that features a carbon-based dyes that improved the solar cells efficiency by up to 2%. As the most recent update regarding the application of inkjet printing, Max Plank Institute Of Colloid and Interfaces in Potsdam-Golm had a group of researchers which was led by Cristina Giordano, that was able to utilized paper sheets to produce conductive structures. Again with the use of an inkjet printer, they made it successful to deposit catalyst on sheets of paper and by simply applying heat into the surface, it eventually turn into a graphite capable of conducting electricity.
Source : Inhabitat
"To fabricate their electronics, the Potsdam researchers converted the cellulose in paper into graphite by using an iron nitrate catalyst laid down by a commercial inkjet printer. After being heated to 800 degrees Celsius in a nitrogen atmosphere, the cellulose expelled water until all that was left was pure carbon. These areas become conductive, while the non-printed areas are less able to move electrons."
As it seems, inkjet printing technology can also be utilized in the field of carbon electronics. Although these inventions are not to be purposely commercialized, it's quite considerable since these breakthrough are still on their research phase. Ink cartridges on the other hand aren't left behind. Unlike with printer toner cartridges, aside from the fact that alternatives such eco-friendly toner cartridges are commonly available, breakthroughs aren't feasible yet. Whereas with inks, there were a few researches like solid inks and bio-based inks that may lead to such innovations where we could hope commercialization is not just an option.
 From the technology used in wine press, Johannes Gutenberg derived his own idea and created his own printing press based on the technologies he had at that time. He was able to build a printing machine out of wood materials, a machine that feeds in paper and slides it out after printing. It became popular all around the world and was widely used by many professionals, and eventually it was divided into two types mainly the inkjet and laserjet printers. A printing system called "moveable-type" which originated from China, was perhaps the second development stage of the printing press. It looks really huge compared to its modern version in the late 60's, the electromechanical writing machine or commonly known as the typewriter. Before, the printing press used metal pieces with embossed letter carvings stamped with inks, these are then pressed onto the paper sheet creating the printout. Now have you wondered what kind of ink was used back then for printing books and readable materials? Long before the genius Gutenberg invented his marvelous printing press machine, ink was already used for printing purposes. Traditionally, people used water-based inks for block printing, however when Gutenberg tried it in his machine, the water-based ink run off the letters. The paper material they were using before was actually damped, this is to allow the ink to withhold effectively onto the paper. So Gutenberg came up with another idea, a thicker ink should be made, which led to the birth of oil-based ink. Gutenberg was successful on developing the oil-based ink, his mixture includes lead, copper, sulfur and titanium, hence the printout glitters at some time. Nowadays, ink materials are produced in mass volumes especially by most printer manufacturers for they need to manufacture ink cartridges for their machines and electronic products. Improvement goes along the way, which results to ink mixtures that contained less metal elements. Aside from the typical ink cartridges that the market offers, there we also have soy-based or bio-based inks, as well as those eco-friendly toner cartridges and ink cartridges which are more efficient to the environment. It took years of research and development until finally, the printing press spread out all around the world and was widely used by most publishing companies. Authors and newspaper publishing companies greatly benefited from it, and they should be thankful solely to the printing press inventor by the name Johannes Gutenberg.
|

 RSS Feed